Building a privacy fence
Welcome back. I see you are ready to begin building a privacy fence. You have read the page on Building a fence, installed the posts and completed the fence frame work.
How private the fence will be depends on the spacing that you chose.
Will the boards be alternating between sides, will you place all boards on one side or build a totally private fence where you nail the boards on themselves? So a privacy fence can be fully private or semi private. Most common spacing would be 3½" down to about 1½". We chose what we like to call a good neighbor fence with boards alternating between the neighbors with a 2½" spacing.
Now that we know the spacing of the fence we can begin building a privacy fence.
The first thing you will do is make a spacer for fast and even fence board installation. You will rip a board to the gap size of your fence.

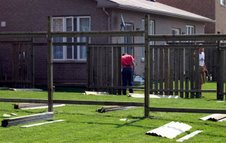
To work efficiently and in an organized fashion the best way is to distribute the fence boards to each section. Depending on your spacing you will need approximately 21 to 25 boards per section for building a privacy fence. You will place half the amount of fence boards on one side of your frame work and the other half on the opposite side.

There is a high chance that none of your sections are identically the same size so the number of board you will install will vary between section.
Pick a starting point, preferably starting from an end post and work on each section as they follow.
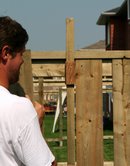
Pick up a fence board and place it beside the first fence post. In our design we have a 2x4 laying flat on an other 2x4 which is on its edge and serves as a stringer. Make sure the fence board is touching the capping 2x4 and the post. For nailing the boards we use a hot galvanized 2" spiral nail.

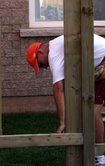
Nail with one nail only, the top corner and the opposite bottom corner of the fence board. Hammer the nail in only partially just enough to secure the board. There will be four nails in each fence board but for now we only secure the boards with two partially nailed in nails.
Now take your spacer and pick up the next board. Make sure your spacer is touching the nailed on board and the new board before you partially nail it in place. The edge of the two boards should be just touching the spacer not too loose and not too tight. Continue installing all the boards on one side of the fence only. You may find that when you come to the end of a section using the spacer the last board may not fit. You will rip a board to fit the size you need. Don’t do this immediately. First finish installing boards on both sides of your fence.
Now that you finished building a privacy fence on one side of your fence project start installing boards on the other side of your fence using the same technique.
Look each section quickly over and if you see something you don’t like you can easily adjust it now. You may find that one of the board was not touching the spacer right and looks crooked or you don’t like the look of a fence board, maybe it has a big crack. This is the time to make changes and adjustments. If you were to nail the boards fully in it would be difficult to make these changes and adjustments especially if you don’t want to destroy the fence board. Even a cracked board could be reused for ripping to a narrower sizes.
Most of the major work is completed in building a privacy fence. Now we will do all the finishing touches.
So you looked over your fence work made changes if needed and you are now satisfied with your work. You can now go back and nail in two more nails in each board and at the same time completely nail in the partially nailed in nails. Do the upper and lower nailing at the same time. When all the nails are in you can start ripping the needed boards to finish each section. Nail them in place.
If you have no gate to build or hang you can now cut the posts to an even height. If you cat the post too short your fence will look stubby and if you leave it too long it looks like you are not finished installing something between the posts. We find a 3½" space between the top of the fence and the fence post attractive.
Place a small peace of 2x4 on its edge on top of your fence at the post Mark a line with a pencil at this height on the post. This is 3½". Mark all the posts. If you are installing a sleeved type of fence cap your cut doesn’t need to be so nice but if you are using a cap that will sit on the post your cut should be as straight as possible. You can use a chain saw or a reciprocating saw.
After you cut all the posts you may nail your post caps in place.
You have now finished building a privacy fence..
If your thinking of building a privacy fence there are some great pictures of fence designes you may want to browes through just click the link. We have several other pages you may find helpful.
